How do I read the schedule?
Last updated August 10, 2026
The Schedule page shows a week at a time by default, and you can look at it two ways depending on what you're checking. It opens on the Service points view — rows are desks, so the first question a schedule answers is "is every desk covered?"
- Use the view toggle to switch between Service points (rows are desks) and People (rows are staff). Whichever you pick is remembered on this device, so the schedule keeps opening your way.
- Open the Filter button to narrow by name, department, or desk — active filters show as a count badge right on the button.
- Read the coverage chips — green means covered, amber means understaffed, red means uncovered.
Tip
Set the filters the way you like, then save your default view so the schedule opens focused on your department every time.
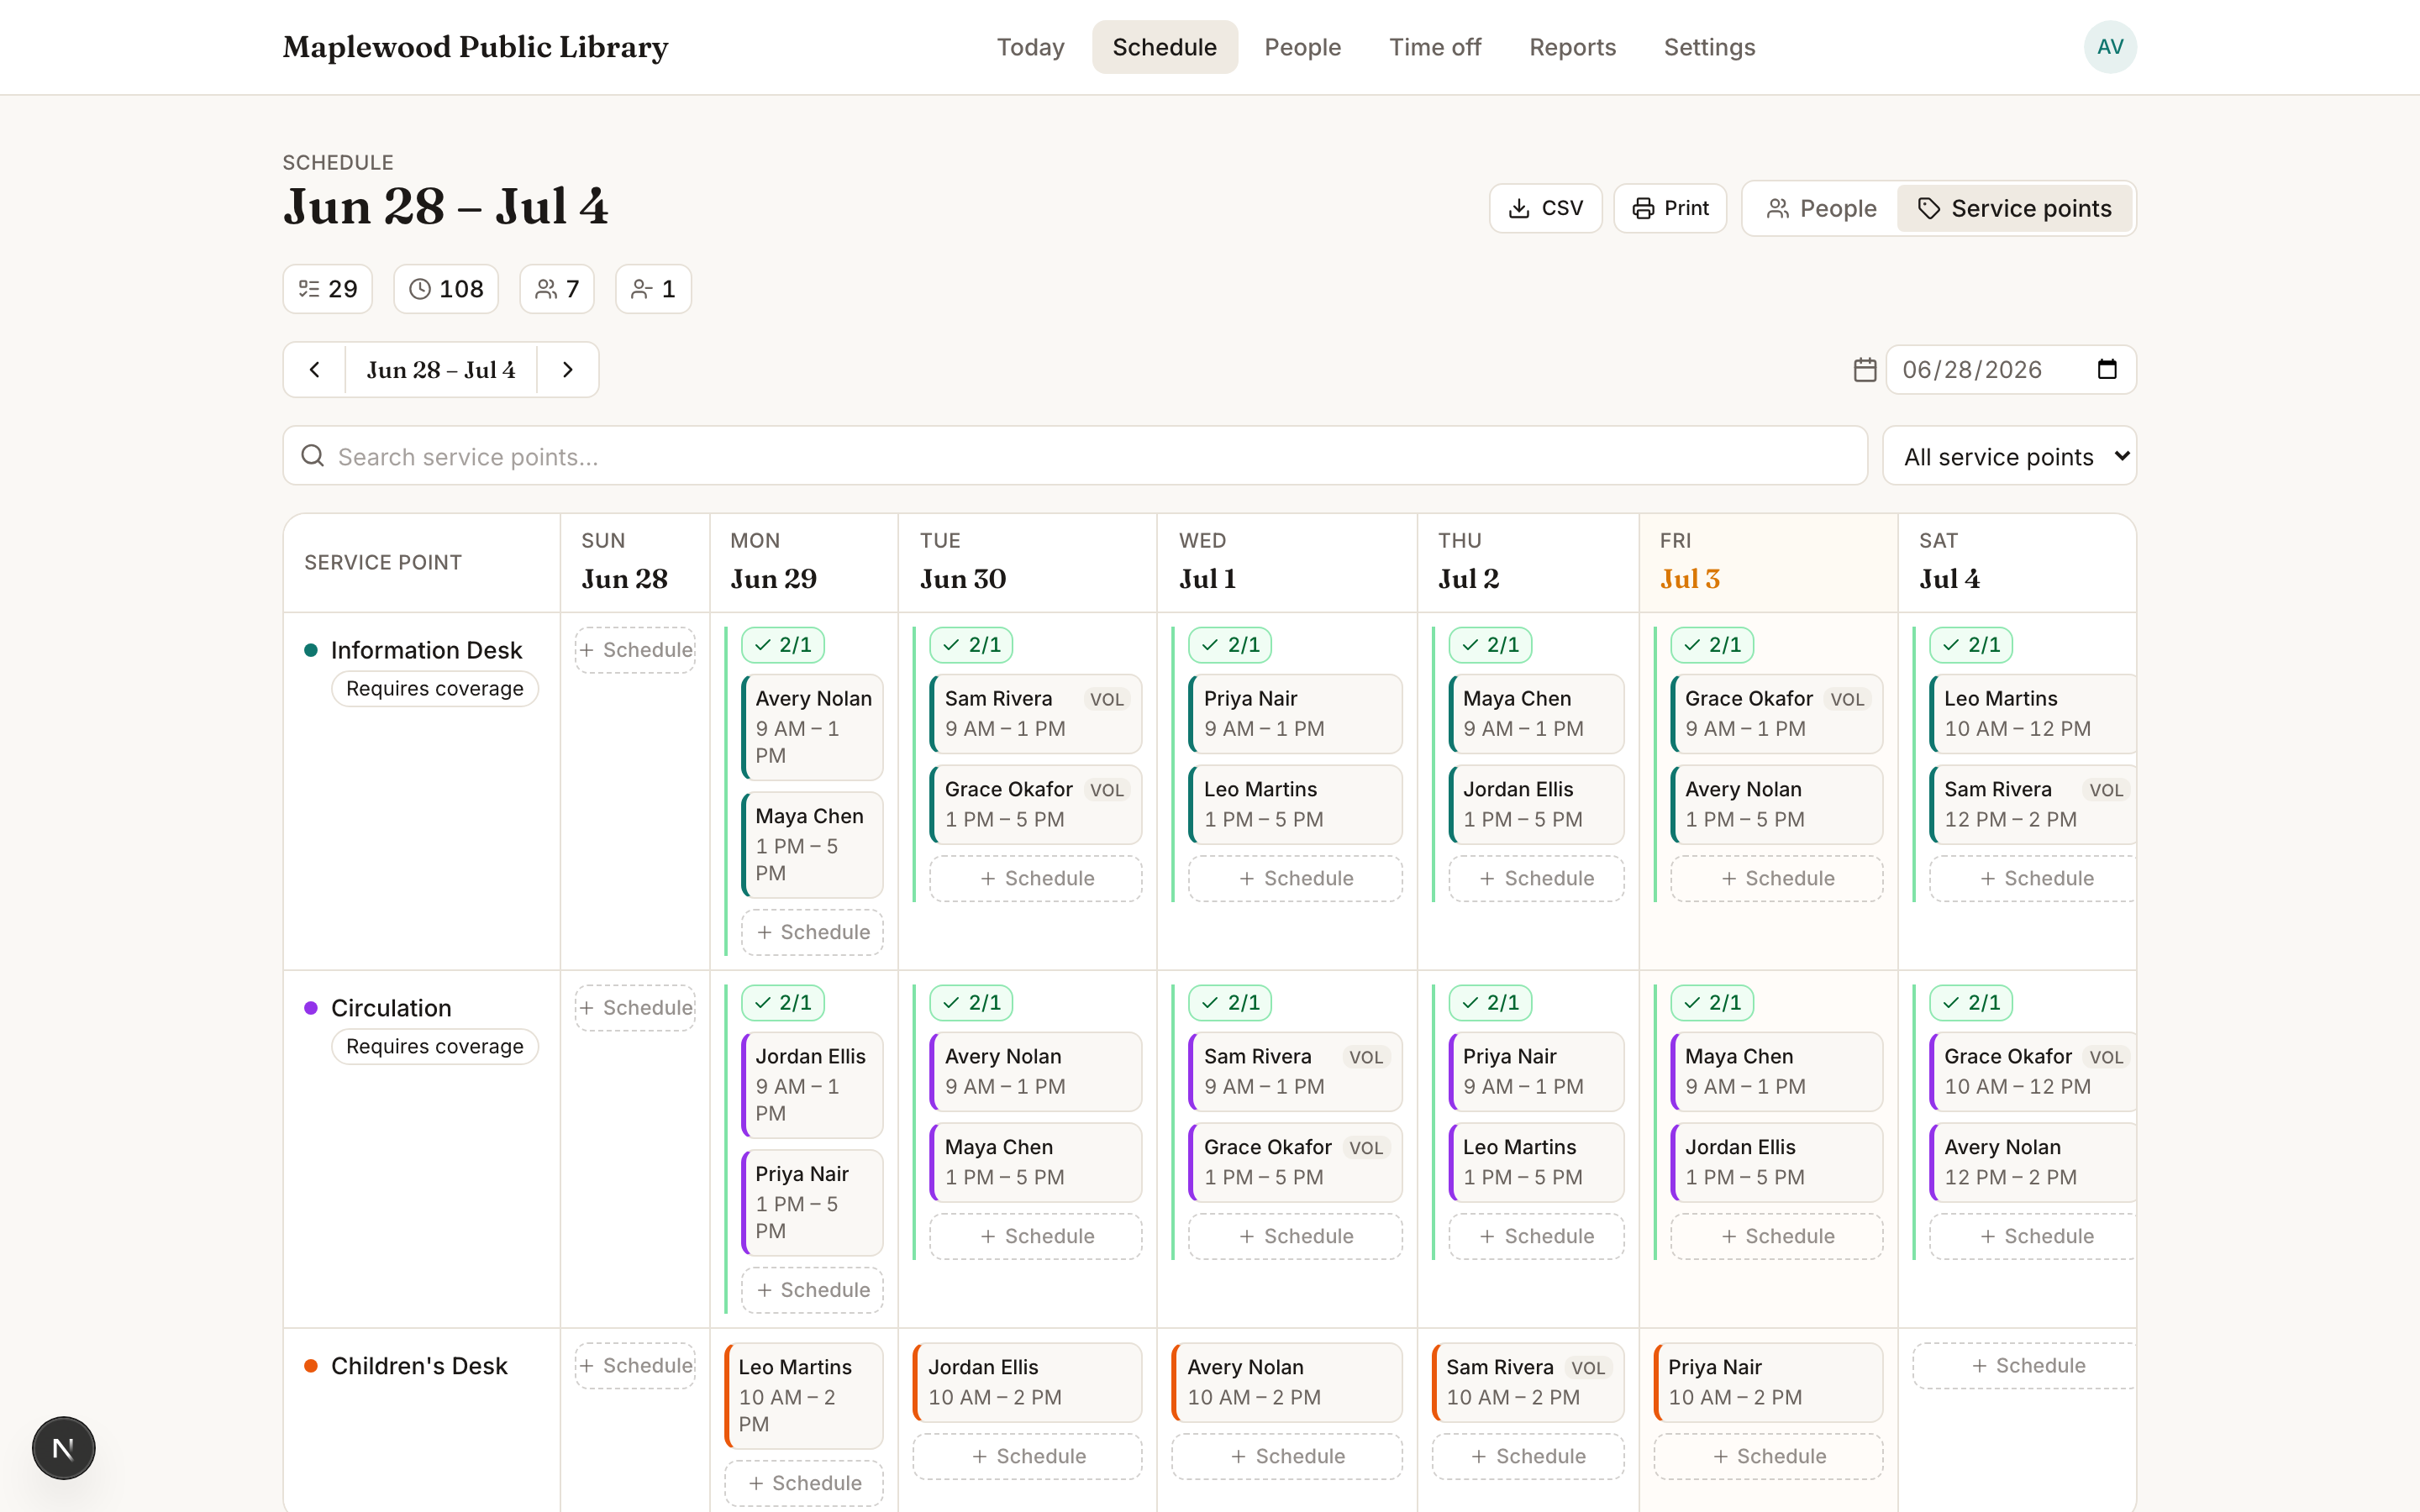
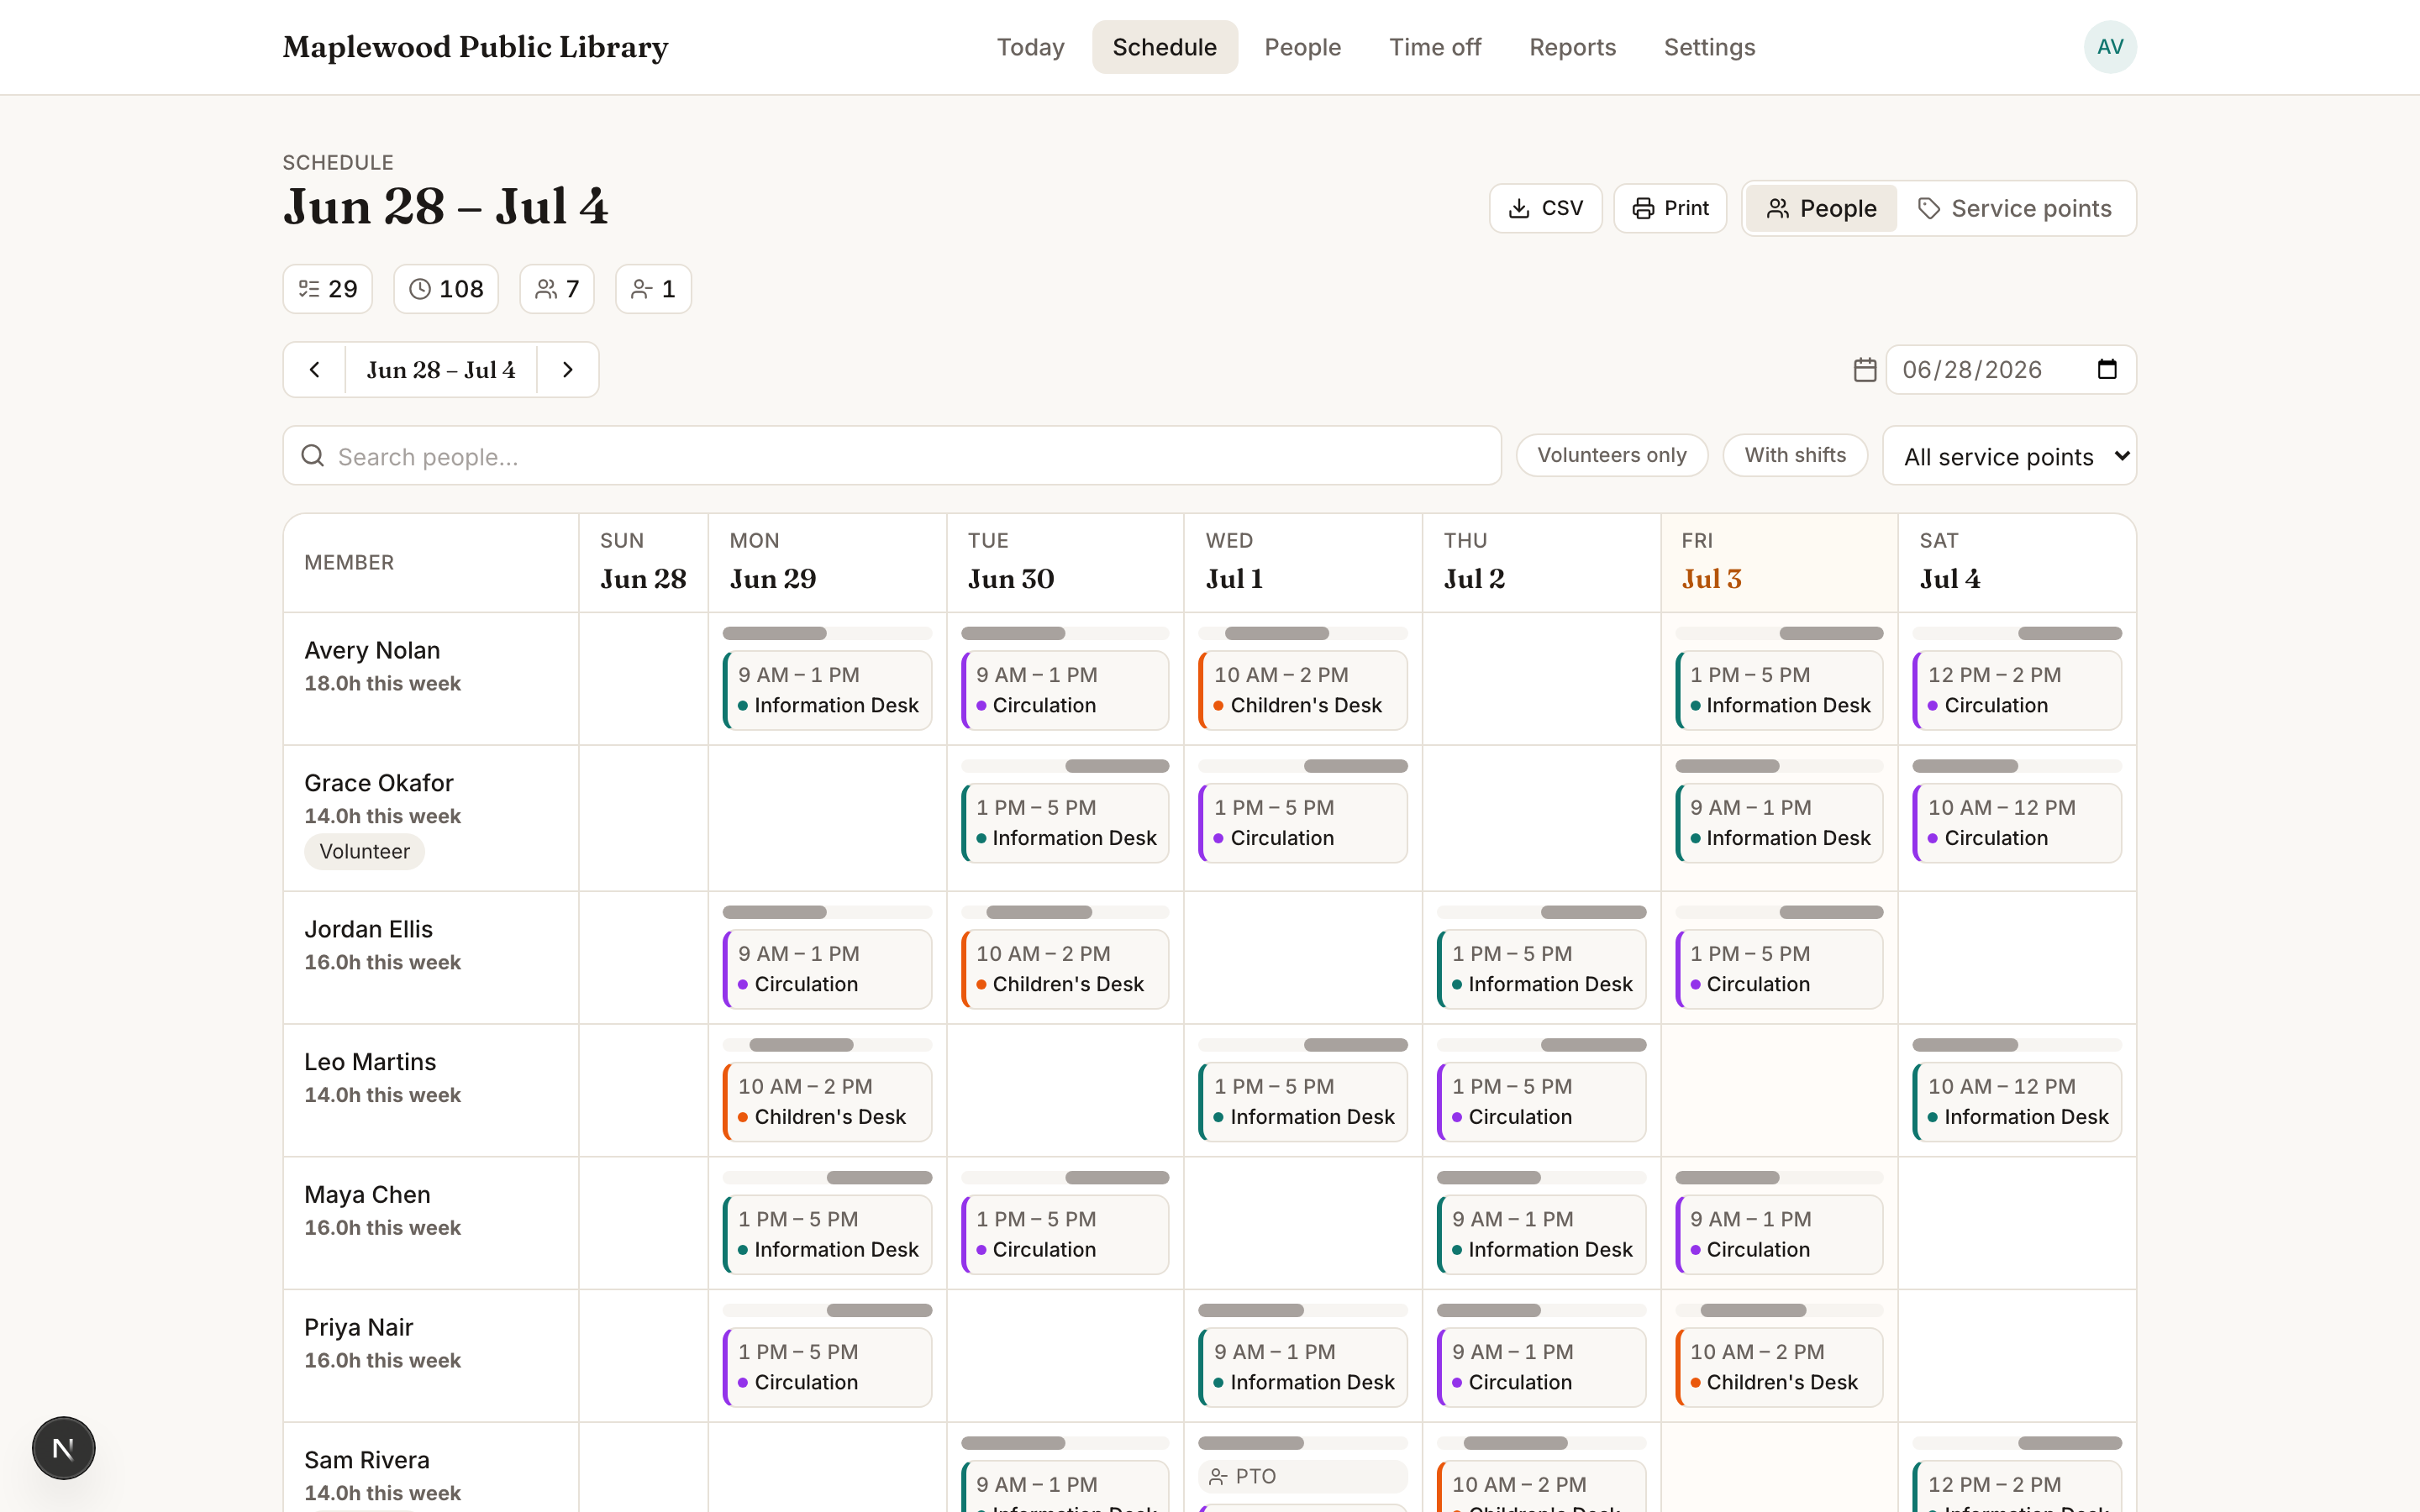
The panel also surfaces weekly stats and warnings — closed-day conflicts, double-bookings, and coverage gaps — so problems are easy to catch before the week starts.
Week, Day, or Month
Above the grid, a Week / Day / Month switcher picks how much time you're looking at:
- Week — the default grid above, best for the "is everything covered" glance.
- Day — one day at a time, laid out for dragging shifts around quickly.
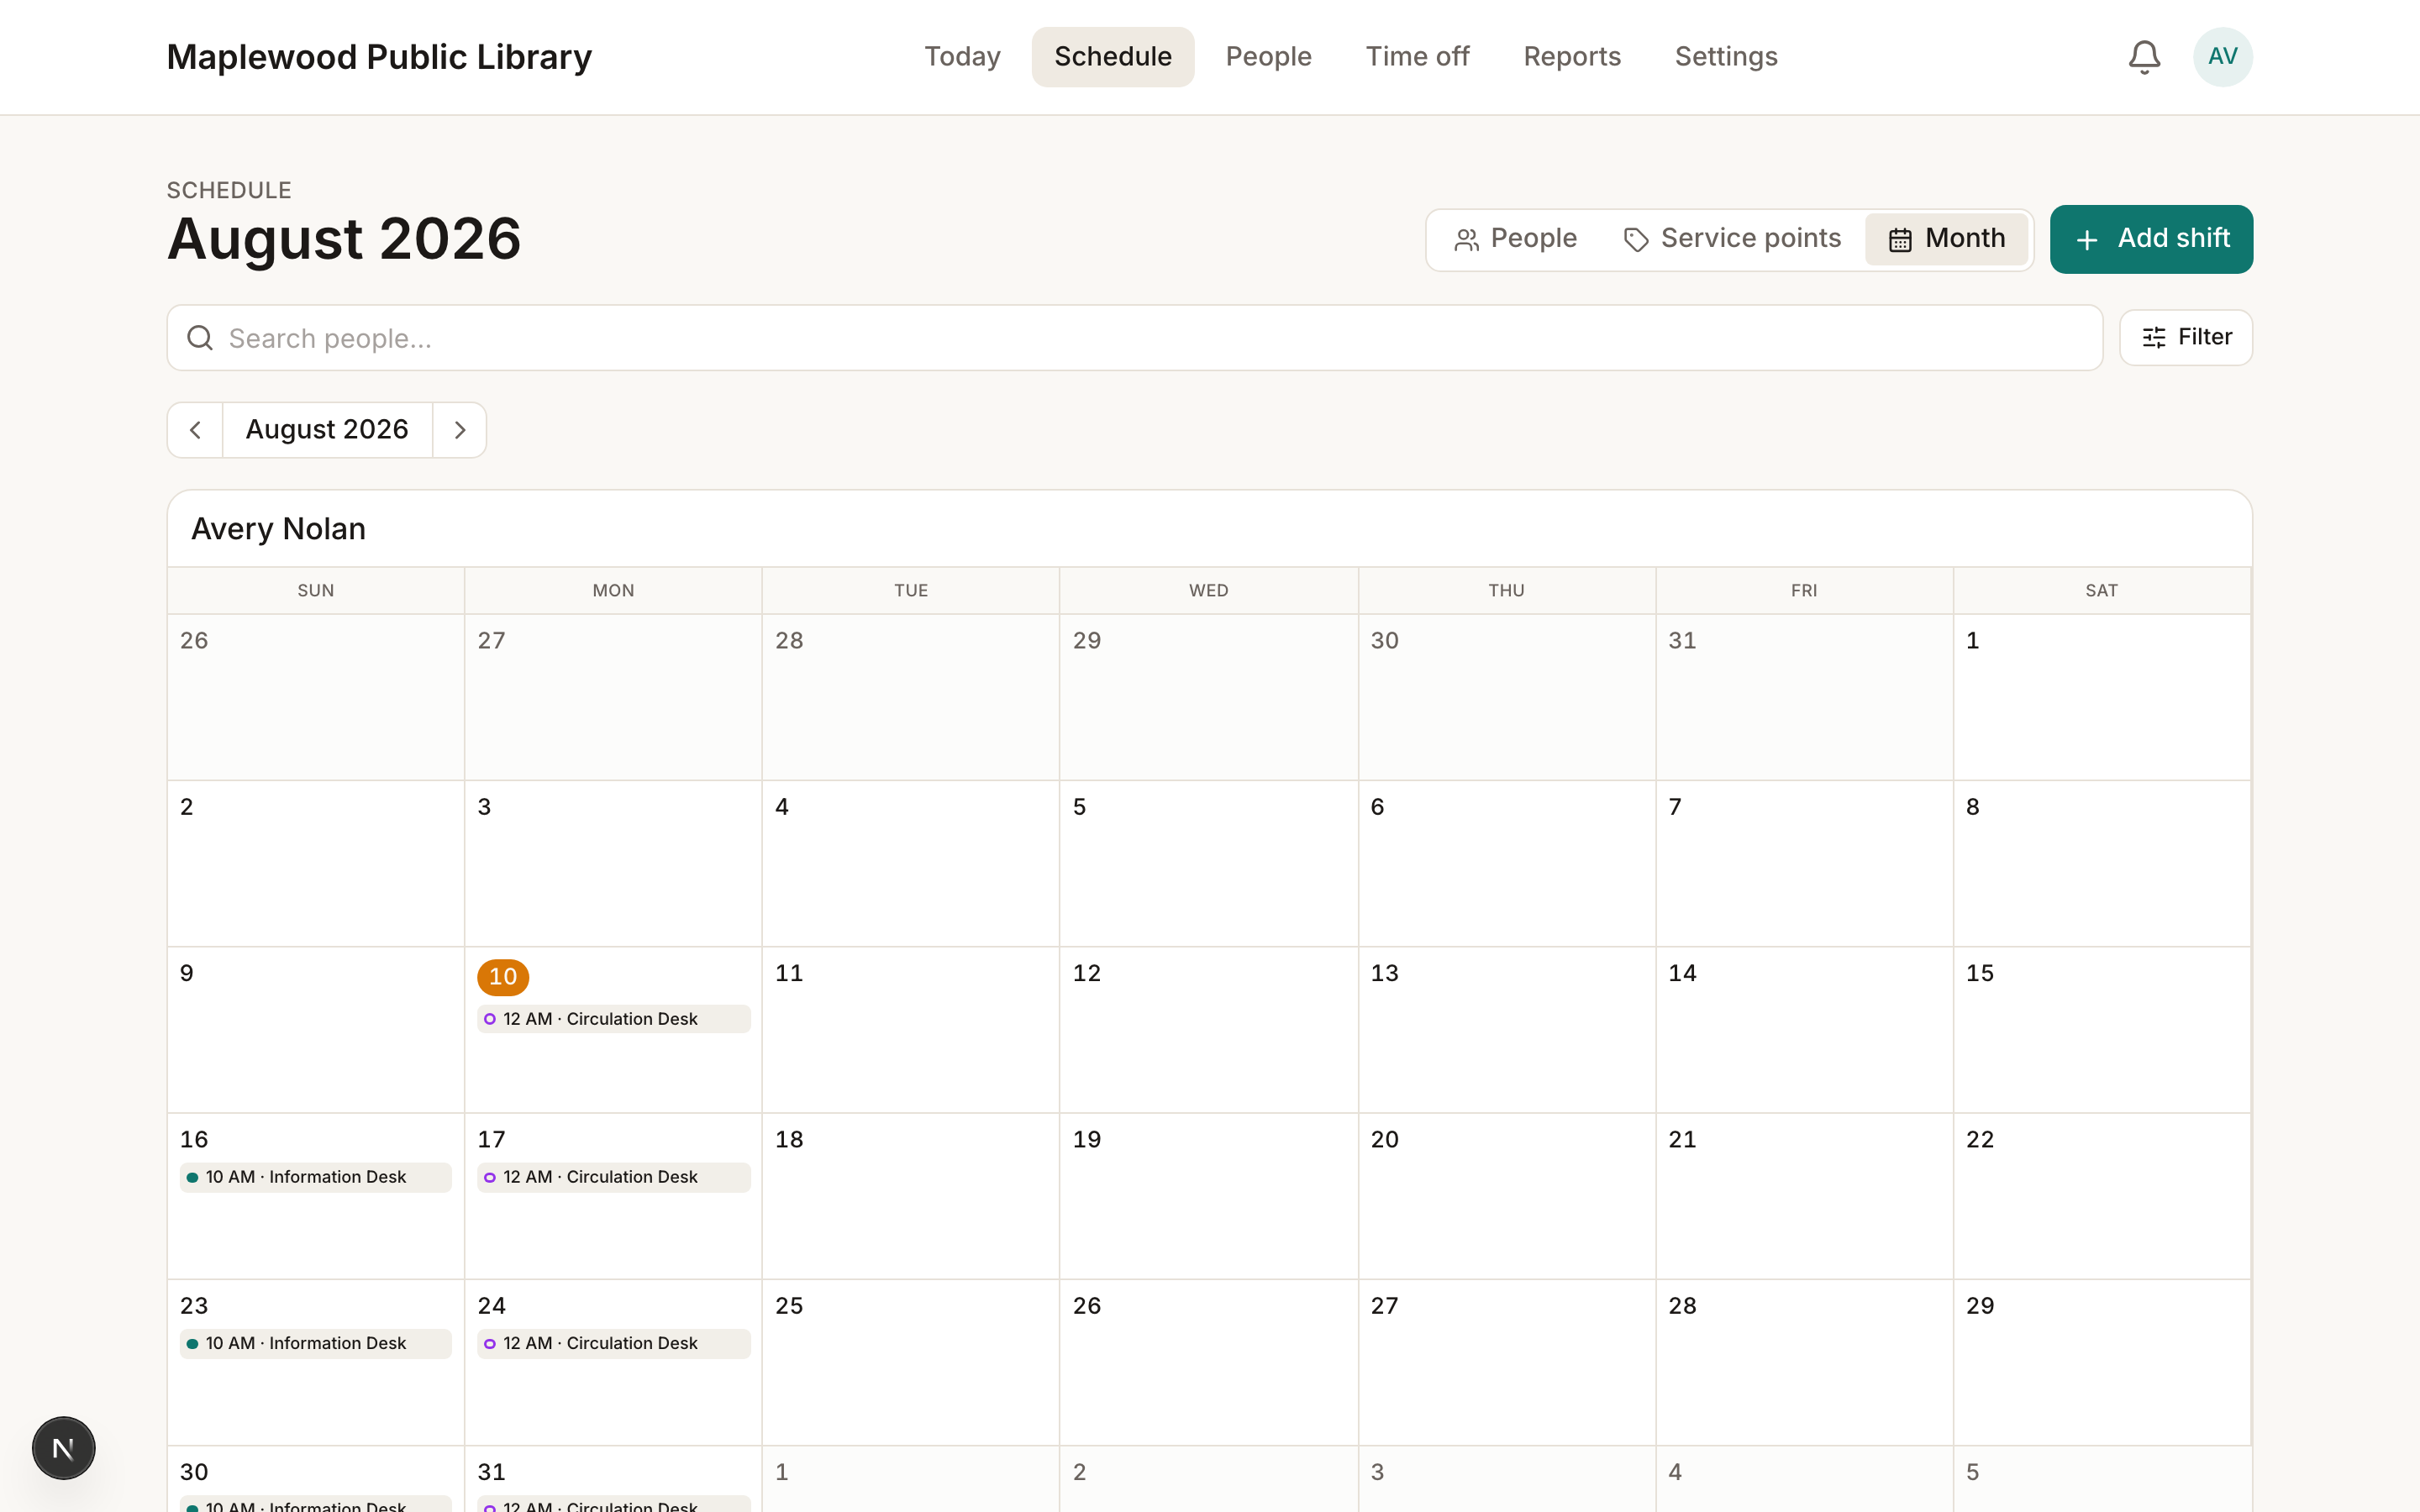
- Month — every person's whole month at a glance, useful when you're planning further out or double-checking a stretch of PTO against the rest of the schedule. It's also available from My schedule, so staff can see their own month, not just their week.
Was this helpful?